| ||
"Slave to a broken order... dare you look upon the truth?"
- -Daimon's Awakened Form
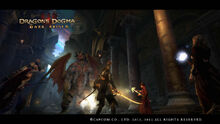
Daimon is the final boss in Dragon's Dogma: Dark Arisen. He is located in the deepest level of the Bitterblack Isle dungeon.
Daimon is an Arisen from an age long past, who refused the choice given to him by the Dragon. In return, the Dragon transformed him into this foul creature gone mad with despair at the loss of his pawn lover.
It is believed this evil entity was born out of the past Arisen's hatred towards the destiny imposed upon him. This monster nurtured from these ill thoughts for centuries, feeding itself from its host as well as the unfortunate Arisens who met their doom in this dungeon. The only thing he needed to be free was someone powerful enough to separate him from Daimon, allowing it to become an independent being. It is the reason why Bitterblack island is still covered in an ominous shroud and the stench of death continues to loom over the place.
Daimon's true strength is unknown.
Given the amount of corrupted thoughts it has consumed, it could be depicted as the embodiment of mankind's chaos; human's desire to end the infinite cycle.
Description
Despite its size and bulk, Daimon is a powerful and agile fighter with potent spell casting and brute force. He will use tactics to lure the party into disarray, which makes him a tough opponent. He is resilient to physical and magical attacks; his head is his weakest spot. Halfway through battle, Daimon will begin to alter his rhythm, casting deadly combinations of magic that may deal serious damage to the Arisen and Pawns. He performs his special move more than once during battle which can drastically change the course of the fight.
Information and Stats
General Info
| Type | Monster / Boss |
|---|---|
| Experience gained |
Total Base Exp of 360,000 (Easy/Normal Mode)
Total Base Exp of 720,000 (Hard Mode)
Can be more or less depending on a few factors such as:
|
| Location |
Stats
| Health | Attack | Defense | Magick Attack | Magick Defense | Weight |
|---|---|---|---|---|---|
| 100,000 | 2,000 | 400 | 2,000 | 400 | 2,000 |
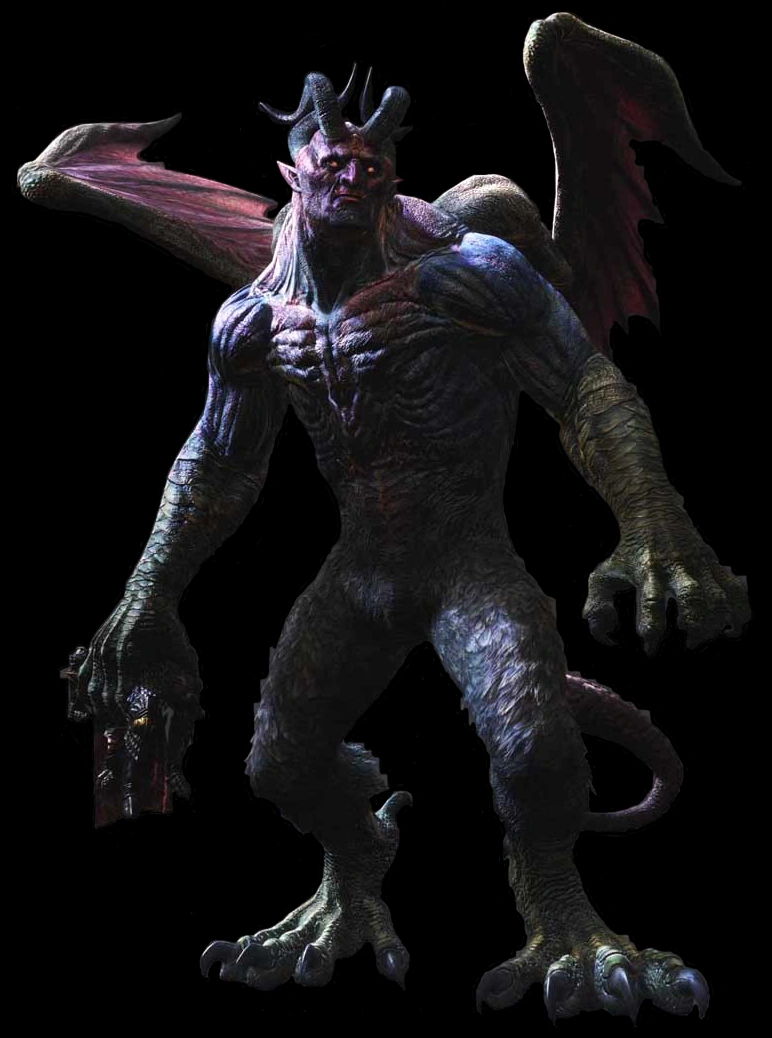
Daimon's First Form

Daimon in his First Form.
When first approached, The Fallen City carries an eerie quietness within its inner limits. As the Arisen travels through it, there is no danger of enemy attack. At the end of the City is a large door, behind which Daimon awaits. Once the door is opened, Arisens are prohibited from leaving and cannot use a Liftstone to exit. Daimon must be defeated in order to leave or choose to return to the player's last checkpoint save. Once Daimon is defeated, many significant changes are made throughout Bitterblack Isle, including enemy spawns, spawn locations and loot from chests.
Note: entering Daimon's chamber and then exiting after the initial story-line defeat will cause enemies to spawn in the City, including Corrupted Pawns and Strigoi. Bloodred Crystals and Strigoi Barb crafting components can be found here.
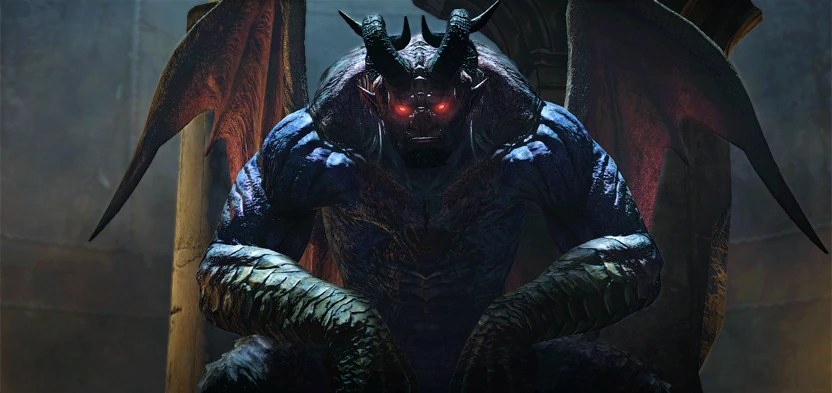
Daimon's Awakened/Second Form
Entering the Sanctum after unlocking the whole of Bitterblack Isle, the voice of Daimon appears to be more ominous. As the battle continues for a second time, it appears as though the fight is identical to that of the first encounter, or so it would seem... Once Daimon's hit points are depleted, instead of victory, a second form is created within Daimon.
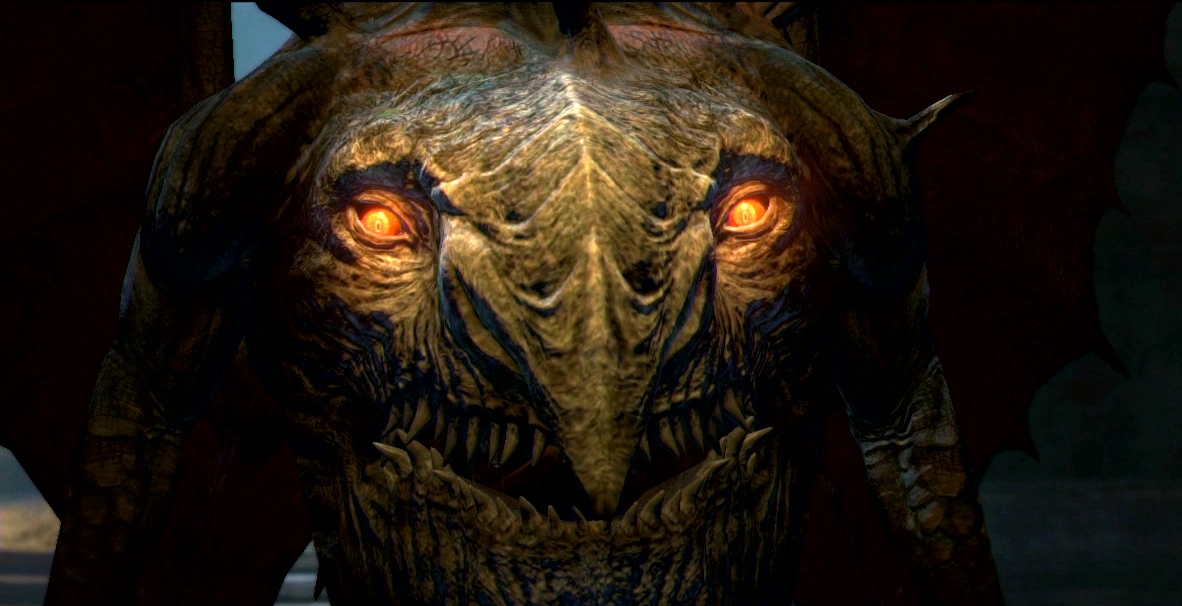

Daimon in his Awakened Form.
Daimon's second form appears after resonating with the Arisen's heart.
A head sprouts and takes form out of Daimon's torso. Its new head resembles that of The Dragon but its deformation has given it an eerily human shape. Barroch defines it as something grievous and dark which bears a stink worse than the dragon itself. In this Awakened Form, the battle becomes more profound. He is very resilient to magick and uses various magical attacks of greater potency. The difficulty of Daimon's second form can be mitigated as the Arisen and Pawns reach higher levels, learn powerful skills and possess stronger equipment.
Related quests
- The Heart of Darkness (slay Daimon's second or 'Awakened' form). Note that if the player has a backlog of three or more quests, this new quest will not appear until the backlog is reduced to fewer than three quests.
Attacks
| Attack | Type | Description |
|---|---|---|
| First Form | ||
| Fist of the Abyss | Phys | Lunges forth at targets, followed by a forceful punch. |
| Roundhouse Kick | Phys | Quickly kicks the target. |
| Charge | Phys | Charges at a target. |
| Death Grab | Phys | Charges forth at a target at frightening speed, grabs the foe and slams them down. |
| Dive Bomb | Phys | Quickly launches into the air and comes crashing down on targets, launching foes into the air. Usually follows Bolide. |
| Dodge Roll | Spec | Quickly dodge rolls behind the target, usually followed up with a Demon Punch. |
| Hate Cannon | Mag | Attacks with powerful magickal blasts that fire several projectiles of magick in a fountain formation at targets. This attack is capable of traveling across a large distance to strike a target. |
| Immolation | Mag | Quickly envelopes the caster's body in flames, knocking clinging targets off. Can cause Burning. |
| Rift Vortex | Spec | Quickly charges and slams the ground creating a vortex, slowly drawing in nearby targets. If the attack is fully completed, targets caught in it will be instantly killed or sent back to the Rift. Interrupting the attack prematurely will cause Daimon to be stunned for about 20 seconds and take increased damage. This attack specifically targets player and pawn Stamina. |
| Levin | Mag | Smites targets from above with a tongue of lightning. Causes Thundershock. |
| Grand Frigor | Mag | Generates many giant spires of ice from the ground at targets. |
| Ice Spikes | Mag | Fires Ice Spikes at targets in a broad sweep. Can be fired from either one hand or both hands. |
| Bolide | Mag | Calls forth meteors down from the heavens to land around the caster. Usually cast in conjunction with Dive Bomb. |
| High Seism | Mag | Shakes the earth, sending eruptions of stone high into the air, stunning and damaging foes over a wide area. |
| Petrifaction | Mag/Status | Invokes a fog that turns those who enter it to stone. |
| Awakened Form | ||
| Sweeping Claw | Phys | Extends claws at a frightening reach, attacking targets with a broad sweep capable of destroying nearby structures with ease. Uses one or both hands. |
| Bite | Phys | Charges one member of the party to bite and chew him with the dragon head on his torso. Will most likely kill the party member as damage output is very high. |
| Immolation | Mag | Quickly envelops the caster's body in flames, knocking clinging targets off. Can cause Burning and Possession. |
| Abyssal Vortex | Spec | Daimon heads toward the center of the room and slams into the ground, creating a massive vortex engulfing most of room for 15 seconds. This attack will quickly draw in unwary targets. Those who were unfortunate enough to be caught in the attack will be instantly killed or sent back to the Rift. This attack specifically affects the stamina of Arisen and pawns. |
| Grand Ingle | Mag | Looses multiple balls of fire that explode upon contact, engulfing both the target and surrounding foes. Can inflict Burning. |
| Grand Levin | Mag | Smites targets from above with a series of tongues of lightning. Causes Thundershock. |
| Grand Comestion | Mag | Rapidly casts a towering wall of flame. Can cause Burning. Known to quickly cast three in rapid succession. |
| Fire Breath | Mag | A stream of fire is released from the dragon mouth on its belly. Shot in a sweeping motion in front of it, by rotating the whole body to the left or to the right. |
| Roar | Spec/Status | Releases a powerful roar which will possess any Pawn that does not achieve 100% resistance against Possession, turning them against the Arisen. |
| Petrifaction | Mag/Status | Invokes a fog that turns those who enter it to stone. |
| Bolide | Mag | Calls forth meteors down from the heavens to land around the caster. |
| High Seism | Mag | Shakes the earth, sending eruptions of stone high into the air, stunning and damaging foes over a wide area. |
Notes
- The Rotwood Depository entrance from Bitterblack Isle is the shortest (and only) way to Daimon, assuming the Arisen has already beaten Daimon's first form once and opened the shortcut from the Corridor of the Hallowed for the second time. It is NOT possible to place a Portcrystal anywhere within Bitterblack Isle or to levitate back up the rear entrance from the main Bitterblack entrance (near Olra).
- Daimon can be "farmed" continuously for multiple runs, without the need to wait or sleep at an inn. Although the treasure chests within Bitterblack Isle will only re-spawn after 3 (in-game) days, Daimon will always re-spawn whenever the Arisen enters the Bitterblack Sanctum. The four treasure chests within the Bitterblack Sanctum will also always re-spawn after Daimon is slain.
- The first time the Arisen defeats Daimon (first form), the reward drop is always the same: One Cursed Bitterblack Armor Level 3, two Daimon's Claws, and one Daimon's Horn. See below for the possible contents of the four treasure chests.
- A single Weal item (like a Martyr's Talisman) can last long enough (5 minutes) to double the experience point gain from killing both Daimon forms if the Arisen is fast enough. Activate the Martyr's Talisman just before landing the killing blow on the first form to maximize the time to kill the second form with Weal still in effect. Refer to the Base Monster Experience Points page to calculate experience and Rift Crystal gains from killing Daimon and other monsters. A Blessed Flower will double all experience gained while carrying it as long as it is protected from a Poisoned Undead's or Cursed Dragon's poison gas attacks. Hired pawns' Rift Crystal earnings are also doubled due to the effect of Weal.
Tactics (Offensive)
- Immune to Silence, Blindness and Torpor (second form only).
- Vulnerable to Lowered Defense, Torpor (first form only), Poison and Tarred in oil.
- At the start of the fight, a Goldforged Rusted Bow or Rusted Longbow is VERY effective against the first Daimon form to slow him down (Torpor) and poison him. You can then switch to another bow or climb him easily. The higher the enhancement of the bow, the greater the chance of inflicting Torpor and Poison with each strike.
- The Awakened Form is weak to Holy.
- Daimon's second form can be poisoned but NOT slowed down (Torpor) by a Rusted weapon, regardless of its enhancement level.
- To increase the chance of successful debilitation, use multi-strike skills like Fivefold/Tenfold Flurry, Downpour Volley, Thousand Kisses, Brain Splitter, Corkscrew Arrow, Sheltered Assault, Cymbal Onslaught, Dragon's Maw or Great Windmill.
- All melee vocations: Climb Daimon's back and slash at his head.
- CLIMBING TIPS: Equip the augments Adhesion (for grip), Opportunism (+30% attack), Arm-Strength (for climbing stamina), and Dexterity (for climbing speed) while wearing Gloves of Might (for even MORE grip and climbing speed) for best results.
- Striders & Rangers & Assassins & Magick Archers :
- Following the above climbing tips and using Thousand Kisses or Dire Gouge (Assassin) are the fastest way to kill the Daimon's first and second forms by climbing onto his back (BEHIND the chest face) and slashing away. From this position, if he tries to burn/dislodge the Arisen, time the dismount (with Instant Reset) to avoid the attack and quickly re-grab his leg on the way down. Daimon can be knocked out of his Abyssal Vortex attack from the rear mounted position and can be slain in as little as 48 seconds (both forms).
- Alternately, use the Blast Arrows + Conqueror's Periapts technique while spamming the Five/Tenfold Flurry skills. Target Daimon's face (first form) and then his lower chest face (second form). With sufficient knockdown/stagger stats, Daimon will be unable to retaliate. Tenfold Flurry is significantly superior to Fivefold Flurry for this strategy.
- Magick Archers : Stacking Demon's Periapts and spamming Six/Ninefold Bolt is also an extremely effective method to stagger him. Another way to deal massive damage is to get below him, and spam Hunter Bolt as Daimon is weak to Holy.
- Mystic Knights : Use the Great Cannon skill to deal considerable damage against his second form.
- Mages and Sorcerers can find a bit of refuge on Daimon's "throne" or the broken pillar (the one which is broken at the start of the fight and won't disappear). Some physical attacks and attacks requiring a "clear line of fire" will be rendered ineffective at times allowing for slightly safer casting. The Miasma spell is handy for this situation.
- Sorcerers: Use Focused Bolt enchanted with Holy Affinity/Pact along with the Ferocity augment, to deal massive damage when multiplied with Demon's Periapts or Salomet's Secrets. Apply the enchantment before entering Daimon's chamber and use the Perpetuation augment, to ensure the buff lasts for the duration of the fight. In Normal Mode, Daimon can be easily stagger-locked using this tactic, possibly preventing it from using its Vortex attacks and shutting it out of the fight entirely.
- Group stat boosters (such as Salomet's Secrets and Tagilus's Miracles) if used instead of Periapts, will multiply the entire party's attack and magick stats. Pawn damage will be increased accordingly in addition to the Arisen's, making the entire party more effective. These boosters also stack up to a maximum of four times.
- A Magick Archer can easily dispatch Daimon's first and second form alone by using Flameshroud in conjunction with 3-7 (depending on your normal damage output) Conqueror and Demon Periapts. Stacking periapts and grabbing hold of Daimon's face(s) with Flameshroud will have a continuous damage effect throughout the fight. You can cling onto him throughout each phase. If you're not knocked off repeatedly, the fight should be over relatively quickly.
Tactics (Defensive)
- The safest place to be in this fight is actually on Daimon's back (both forms)! Read the climbing tips above.
- STAMINA is a crucial stat to watch in this fight, which will likely be a marathon. Skill spamming and climbing will quickly deplete the stamina bar and leave the Arisen vulnerable to Daimon's onslaught, particularly the Rift Vortex.
- Bring Stamina curatives like Staminal Drench, Kept Sour Ambrosial Meat, Kept Giant Rank Fish, Kept Golden Eggs, Liquid Vims, Mushroom Potage, or Large Mushrooms to avoid falling off Daimon's back from exhaustion.
- Use the Athleticism (for evasive running), Arm-Strength (for climbing), Proficiency (for melee skill spamming), Endurance (+100 stamina) and Potential (+100 stamina) augments if the Arisen has a low stamina character build.
- Daimon's signature ability, the Rift Vortex, will continuously draw the Arisen and the party towards it. Getting caught in the vortex will cause either death for the Arisen or send pawns back to the Rift (with no chance for revival). Luckily this attack can easily be interrupted by staggering him with focused attacks to the head. This will cause him to curl up into fetal position and hover mid-air close to the ground, momentarily vulnerable. Continuous attacks while he is in this state will stun him for about 20 seconds during which the party receives a damage bonus.
- The Vortex attacks are triggered by Daimon absorbing specific amounts of health loss rather than by losing a lot of health in a short amount of time. It generally triggers twice - first around when he has lost 3 dots/bars of Health, and the second when he has 2 dots/ bars of Health left. If Daimon is cut down to 3 dots of Health while staggered during the first Vortex, then the next one triggers randomly.
- The Awakened Form's Abyssal Vortex, is incredibility deadly and usually spells defeat for pawns unless it is interrupted. It has a very large area of effect and will quickly deplete stamina as the party tries to run from its epicenter. Feeding one's pawns via the Arisen's use of Mushroom Potage is successful at saving Vortex-trapped pawns at approximately a 90% success rate.
- Players can interrupt the Rift Vortex prematurely by striking the head as he initiates it.** Ranged Vocations, such as Striders and Assassins, can use a well placed Fracture Dart or Terrible Bend to end Daimon's Rift Vortex, respectively. Rangers with high knockdown/stagger can easily and instantly terminate this attack with Tenfold Flurry or Deathly/Reaper's Arrow, especially if using a Blast Arrow load.

- If Daimon is very close to a wall before he is about to use his Rift Vortex then it is possible for him to phase through the walls and glitch with the attack. If this happens the suction effect will not occur. Only if the Arisen or pawns enter the circular field of the attack will they be damaged. It is an easy way to avoid letting the pawns die or using stamina curatives.
- Also note: Strider or Ranger Pawns will use Dodge Roll to smartly move away from the Rift Vortex attack, not depleting any stamina.
- Daimon's hand will glow blue before he charges. His Death Grab is always made with his right hand and can be dodged by running towards his left arm. While not very damaging, avoiding it can help to conserve curatives. In Hard mode, this grab can be quite lethal, like his other attacks.
- The shots generated by Hate Cannon can be avoided by hiding behind the various pillars (not guaranteed), the rubble of the pillars if they've been destroyed, by standing behind the rubble Daimon uses as a throne, or by standing directly beneath Daimon. Be forewarned that he can damage players upon landing.
- Daimon is capable of casting Bolide and then perform the Dive Bomb attack at a target. This can cause targets to be launched into the air and then be continuously struck by the meteors.
- Daimon is also capable of using an explosive version of Immolation for a brief moment in order to to blast away any players climbing it. Fighters and Mystic Knights can avoid this by jumping straight into the air just before his arms are completely folded and holding the "Block" button. Once the Arisen "bounces" from blocking the impact, simply tap the "Grab" button to reattach to him.
- Daimon's Awakened Form is capable of rapidly casting a series of three Grand Comestions which can easily juggle, stagger players and/or apply the Burning debilitation.
- A number of curatives can be found throughout the battlefield. A Wakestone and a Godly Analeptic can be found near the throne in case the situation demands it. A Salubrious Brew is usually in the corner nearest the door to the Treasure Room; there are three to four Harspud Sauces randomly scattered between the walls and pillars.
Tactics (Pawn-specific)
- Pawns can lend tremendous offensive contributions against Daimon's first form, but lower level pawns can be frustratingly useless against his second Awakened form (offensively), regardless of their inclination.
- It is likely the Arisen can save pawns from the Vortex Rift attacks by feeding trapped pawns Mushroom Potage from the Arisen's inventory. This is not always guaranteed. It is sometimes more efficient to shoot Daimon in the face with Blast Arrows to interrupt the attack.
- Against the second (Awakened) form, lower level pawns may be more useful for support roles: healing, buffing, carrying supplies, and distracting the Daimon. A Ranger equipped with Great Gamble is capable of taking up to two healthbars from Awakened Daimon. A Mage pawn equipped with a Legion's Might staff can do all of the above without the Arisen needing to resurrect them when they die (the staff will auto-revive the equipped pawn). Unless they get sucked into the Rift Vortex, the pawn will reliably continue to support the Arisen throughout this epic battle, who can thus focus on offense against the Daimon.
- High Grapnel will hold the Daimon (first form) firmly in place while the Arisen attacks or climbs him. Consider equipping the Main Pawn as a Mage with ONLY High Grapnel (no other spells should be enabled) and a Legion's Might staff to ensure that the pawn repeatedly uses this spell for the duration of the fight. The staff's low magic strength is irrelevant to the effectiveness of High Grapnel, with the added benefit of continually resurrecting the pawn as needed. The pawn will not need to be fast so feel free to load up the pawn with Blast Arrows, Wakestones, Kept Giant Rank Fish, Liquid Vim, etc. Daimon will still be able to cast spells (and the Abyssal Vortex) while held in place, but his wild flailing attack options are severely limited.
- The video at the below link illustrates the use of High Grapnel. Both support pawns are mages with only High Grapnel equipped. The battle takes a little longer by not having the support pawns contribute to attack damage. However, Daimon is much more sedate as a result of the dual High Grapnel spells. The video also illustrates the climbing technique. It allows Daimon to be taken out quickly before he cycles through his large repertoire of devastating attacks. Finally, it demonstrates that, if Daimon is aggressively engaged while being grappled, Daimon will direct his attacks at the immediate threat and not at the mages casting High Grapple at range. If this approach is used, a Legion's Might is not necessary and the mage can be equipped with his or her preferred weapon.

DaimonT
Two mages, each equipped with High Grapnel as their only skill, prevent Daimon from rampaging--Hard Difficulty
Rewards
Possible Daimon drops
- Daimon's Claw (common, always drops 2 after his first defeat)
- Daimon's Horn (common, always drops 1 after his first defeat)
- Vile Wakestone (uncommon, 2nd form only)
- Bitterblack Gear Lv.3 (uncommon)
- Bitterblack Novelty Lv.3 (uncommon)
- Bitterblack Weapon Lv.3 (rare)
- Bitterblack Armor Lv.3 (rare, always drops 1 after his first defeat)
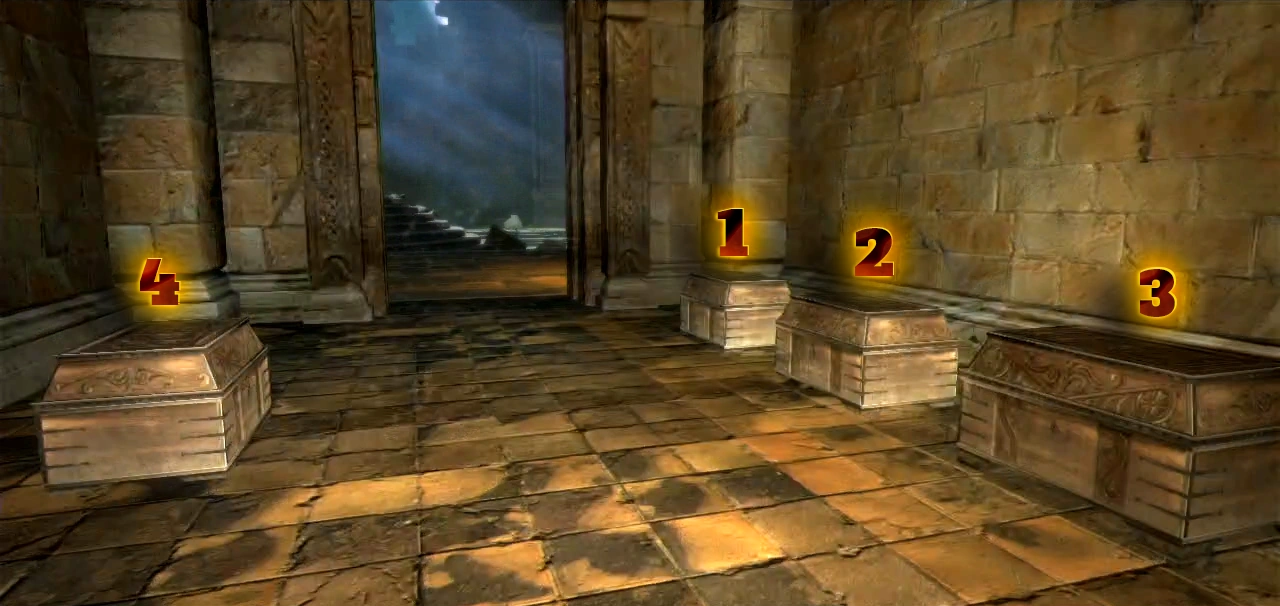
Treasure chest room (accessible only after defeating Daimon)
|
|---|
Chest #1
- Bitterblack Weapon Lv.2 (Pre-Daimon, common)
- Bitterblack Armor Lv.2 (Pre-Daimon, rare)
- Bitterblack Weapon Lv.3 (Post-Daimon, common)
- Perfect Rift Crystal (Post-Daimon, uncommon)
Chest #2
Chest #3
- Bitterblack Novelty Lv.3 (Pre-Daimon, common)
- Bitterblack Armor Lv.3 (Post-Daimon, common)
- Rift Polycrystal
- Perfect Rift Crystal
Chest #4
- Bitterblack Gear Lv.3 (Pre-Daimon, common)
- Bitterblack Armor Lv.3 (Pre-Daimon, rare)
- Bitterblack Novelty Lv.3 (Post-Daimon, common)
- Rift Polycrystal
- Perfect Rift Crystal
- Note: Aside from Chest #2, all of the chests can also contain Rift Crystals of various increments instead of what's listed above. Chest #4 can yield a Perfect Rift Crystal (10,000 RC).
Quotes
First Form
- "I have raged, and wrought destruction."
- "Naught shall remain."
- "No paths lead hence."
- "Repent the folly of ascribing meaning to the void."
- "Fall, molder, and begone."
- "Be cast into nothingness."
- "With my every breath I cursed the eternal chain and all who would perpetuate it."
- "But more than this, I have waited..."
- "Waited for one with a will to outmatch my own, that they may break the bonds that hold me here."
- "In hate's demise... freedom..."
Awakened Form
- "Slave to a broken order... dare you look upon the truth?"
- "I have seen the scattering of countless myriad souls... they gather and flow to become as the river of time, expanding to fill the firmament."
- "What a base and trifling creature is man... yet at once he is the master of this empyreal flow, grand as all the heavens."
- "I bid you, hone your spirit. Refine it. I shall await you in the crucible of souls."
Unique pawn quotes during Awakened Form
- "A nightmare... 'tis a nightmare made real."
- "'Tis overwhelming... 'tis overwhelming!"
- "'Tis not the same creature...I sense the dragon!"

Gallery
")
")
")
")
")
")
")
")
")
")
")
")
")