 |
|---|
"I must feed... slake my hunger!"
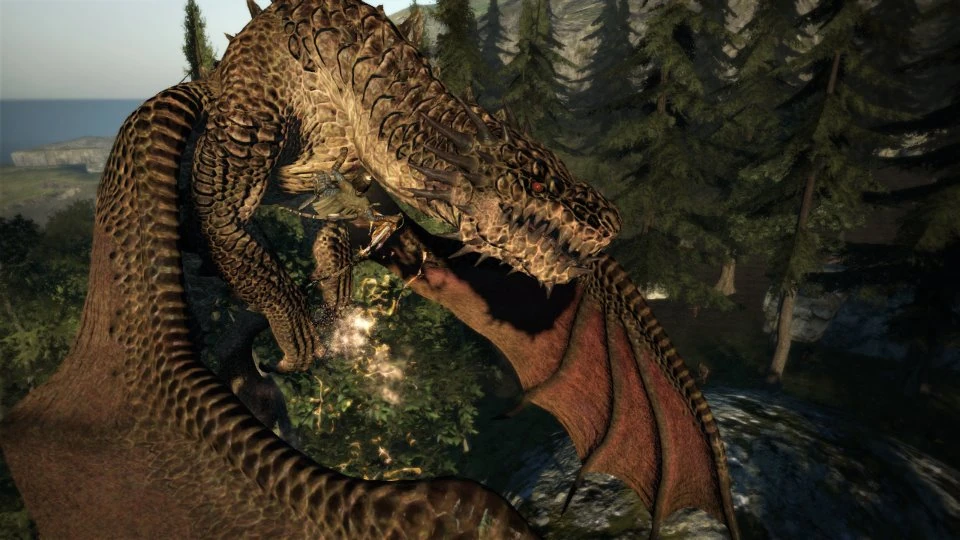
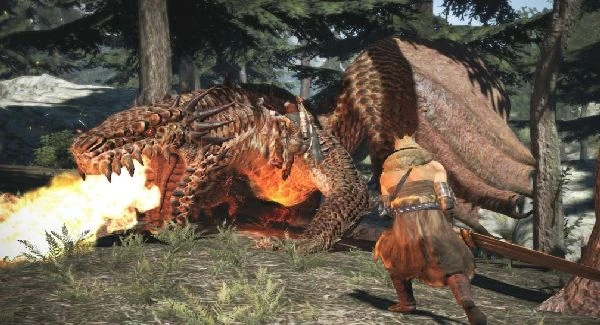
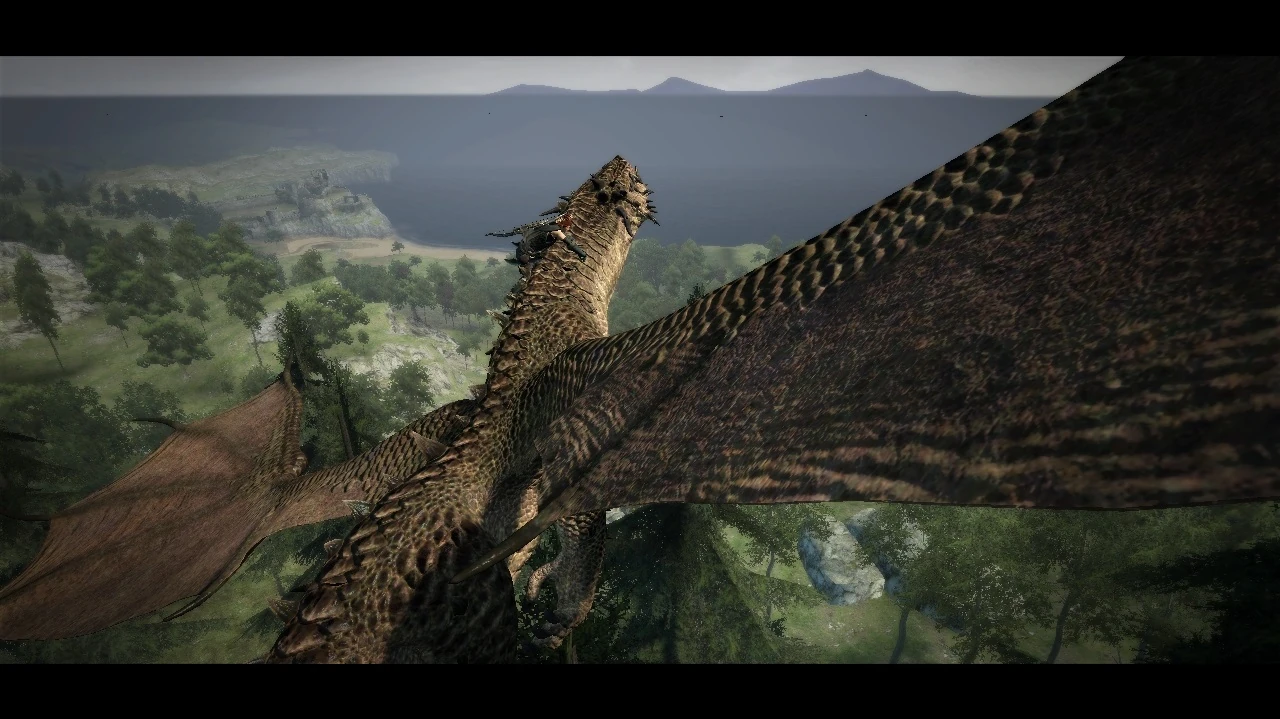
Drakes are an astoundingly hardy and powerful adversary, possessing many mighty physical attacks, the means of flight, and the ability to breathe Fire to roast their foes. All lesser dragonkin can seize control over the will of Pawns for a brief period and then use them against the Arisen. The Drake bears a glowing chest where its heart resides and serves as an exploitable weakness.
Description
A more common type of dragon known as a Drake
The Red Drake is one of the smaller cousins of the titular Dragon in Dragon's Dogma. The Drake is one of the lesser dragonkin encountered in the game. The Drake will most likely be the first dragonkin encountered by the Arisen, as it is the only dragonkin to exist in Gransys prior to The Final Battle.
Drakes are similar to its cousins, the Wyrm and the Wyvern, bearing many of the same abilities and characteristics, however it is instead related to the Fire element. As such the Drake bears a natural weakness to Ice based attacks.
Defeating a Drake has a small chance of dragon forging the player's equipment, provided it has at least one level of enhancement.
Information and Stats
General Info
| Type | Dragon / Boss |
|---|---|
| Experience gained |
Base Exp of 25,000 Can be more or less depending on a few factors such as:
|
| Location |
|
Stats
| Health | Attack | Defence | Magick Attack | Magick Defence | Weight |
|---|---|---|---|---|---|
| 80,000 | 1,600 | 400 | 500 | 230 | 5,000 kg |
Damage Taken
| Slash | Bash | Fire
|
Ice
|
Thunder
|
Holy
|
Dark
|
|---|---|---|---|---|---|---|
| 100% | 100% | 20% | 150% | 100% | 100% | 100% |
Debilitations/Resistance
| Debilitation | Resistance |
|---|---|
| Burning | Resilient |
| Drenched | Immune |
| Tarring | Immune |
| Frozen [1] | Resilient |
| Blindness | Immune |
| Curse | Immune |
| Lower Defense | Resilient |
| Lower Magick | Resilient |
| Lower Magick Defense | NA |
| Lower Strength | Resilient |
| Petrification | Immune |
| Poison | Weak |
| Possession | NA |
| Silence | Weak |
| Skill Stiffling | NA |
| Sleep | Immune |
| Torpor | Weak |
- ↑ While they are vulnerable to the Frozen status, it impossible to shatter Dragonkin.
Attacks
| Attack | Type | Description |
|---|---|---|
| Fire Breath | Mag | A massive stream of fire is blasted from its mouth. Can cause Burning. The Drake can use this move while moving forward or backing away from its target(s). |
| Dive | Phys | A powerful lunge from the air. |
| Charge | Phys | Charges at a target on the ground. |
| Grab (Arisen) | Phys | The Arisen is grabbed and then slammed into the ground. |
| Grab (Pawn) | Spec/Status | A Pawn is grabbed but instead of being slammed into the ground, the Drake tries to seize control over the pawn. Causes Possession, which turns the Pawn against the Arisen. |
| Slam | Phys | Will take flight and slam its stomach into the ground, inflicting massive damage to anyone underneath. |
| Aerial Spin | Phys | If the Arisen or one of his/her Pawns are holding onto the Drake while it is in flight, it will spin rapidly, draining a massive chunk of stamina. |
| Stomp Attack | Phys | A powerful attack with its feet, staggers targets. |
| Sweeping Backhand | Phys | A backhanded slap with either one of its front claws. |
| Tail Sweep | Phys | A powerful spinning attack with its tail, knocks targets off their feet. |
| Roar | Spec/Status | A mighty roar that kills all Pawns within range, staggers the Arisen and can cause Skill Stifling. |
Locations
| Location | Map Location | Visual Location | Respawn Time |
|---|---|---|---|
| Devilfire Grove | 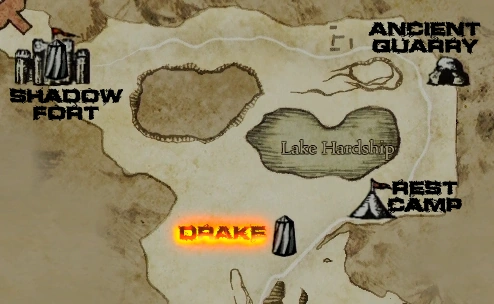
|

|
7 Days |
| Conqueror's Sanctuary | 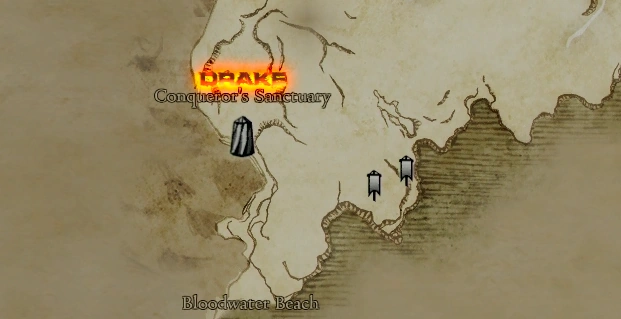
|

|
3 Weeks |
| Estan Plains | 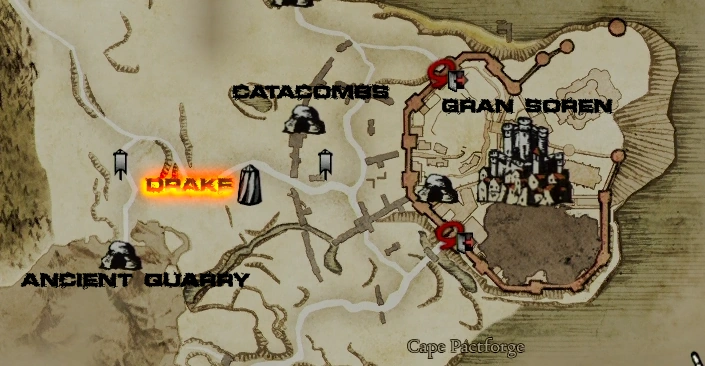
|

|
7 Days |
| Everfall | 
|

|
7 Days |
Rewards
| Dropped Item | Regular Drop (%) | Drake Horns Destroyed (%) | Drake Wing Destroyed (%) |
|---|---|---|---|
| Dragon Scale | 20% | - | 14% |
| Amber Dragon Scale | 32% | - | 5% |
| Dragon Claw | 12% | - | - |
| Dragon Horn | 1% | 100% | - |
| Indurated Dragonsblood | 5% | - | - |
| Rift Cluster | 5% | - | - |
| Great Dragon Alula | - | - | 80% |
| Drake's Tear | 5% | - | 1% |
| Greatwyrm Stone | 1% | - | - |
- Killing the Drake gives a percentage chance of dragon forging equipment depending upon enhancement level of the equipped gear.
- Even after the Drake dies, 2 Dragon horns (if not already dropped) from the head and a Dragon Alula from its back (where the wings intersect) can still be obtained from the Dragon's corpse if the Arisen continues to attack those areas before the Drake disintegrates. The pawns will declare ''The horn is destroyed!'' when a horn part drops, and declare ''On solid ground, the advantage is ours'' or ''It is grounded, master'' when the Alula part drops from the wing area of the back. Up to 8 various Dragon parts can be extracted from the Drake in a single fight.
- After a reload or retry the dragon's horns regenerate. This effectively means that after a save and reload more horns can be broken off allowing for multiple Dragon Horn drops in one fight.
- Having all three dragon tears in your inventory guarantees the drake will drop a Wakestone (Post-Game Only and you must be in The Everfall.), and improves the chances of receiving the above drops.
- The Drake's Tear item drop rate increases substantially in Post-Game.
Pawn Bestiary Knowledge
- Draconian Strategy Vol. 1 - Knocking a Dragon off balance and to the ground will expose its heart.
- Draconian Strategy Vol. 2 - A Dragon is vulnerable to being staggered or knocked down when it is preparing its breath attack.
- Destroy the wings to ground them for the remainder of the fight. After knowledge is triggered Pawns will state "'Tis grounded, Master."
- Destroying the horn drops it as loot which can be picked up immediately. Pawns will yell "The horn is destroyed!"
- While a Dragon is hovering, attacking its head, heart or wings will knock it to the ground.
- When a Dragon grabs a pawn and tries to possess it, a strong hit to the paw will stagger it and release the pawn, grants knowledge.
- These techniques are common to all Dragonkin and once performed or if the scrolls are used will grant knowledge stars for every Dragonkin's bestiary.
Enemy Specific - Weak to Ice.
In addition to witnessing these techniques, it may be necessary for Pawns to participate in killing 15 Drakes either with their own Arisen or while travelling with others.
Tactics (Offensive)
- Strong against Fire enchanted weapons and spells.
- Weak against Ice elemental attacks by 150% (High Frigor, Almace sword, Dragon's Glaze longbow, Chilling Razors, Gicel etc).
- The heart on the front of its chest is the weak spot. When the Drake is nearly dead the exposed heart MUST be struck by the Arisen in order to kill it.

- All vocations: Simply climb up to its heart and attack the heart (Thousand Kisses and the Assassin's Dire Gouge kill the quickest).
- When climbing the Drake, equip the augments Arm-Strength (for stamina), Opportunism (+30% strength), Adhesion (for grip), Dexterity (for climbing speed) with Gloves of Might (for even more grip and climbing speed) for best results. Bring stamina curatives (like Liquid Vims, Large Mushrooms, Ambrosial meat or Giant Fish) as a backup, as climbing can quickly exhaust the stamina bar.
- Assassins, Striders & Rangers : First, shooting the Drake with a Gold Rarefied Rusted Bow/Rusted Longbow will inflict the Drake with Torpor, slowing it down and make this fight much easier. You can then switch to another bow like Dragon's Glaze (Ice element imbued) and kill it in seconds since shooting its heart is easy in slow motion. Note that the higher the enhancement of the Rusted weapon, the higher the chance it will inflict Torpor.
- Striders & Rangers: Fivefold Flurry or Tenfold Flurry combined with Blast Arrows make short work of this battle; simply hitting the Drake's heart at close range with two of those attacks will make it drop and writhe in pain, allowing for further attacks. This can be done again as soon as it gets up, effectively stun-locking it and preventing it from retaliating, all while exposing its heart for more attacks.
- Striders & Rangers : Mighty Bend or Deathly Arrow with an Ice enchanted bow will instantly cause the Drake to hit the ground. This can be pulled off every time the drake is using its fire attack or holding a pawn. In fact it's more important to inflict heavy damage in a single shot as opposed to doing multiple low damage hits if trying to take it out of the air.
- Fighters: Consider using an enhanced Rusted Sword and/or shield to inflict Torpor (slow) on the Drake, then switch weapons mid-fight. (The higher the enhancement of the Rusted Sword, the higher the chance it will inflict Torpor). Then, spam Sheltered Assault and/or Dragon's Maw (Great Windmill if using Assassin) to the Drake's heart with an Ice enchanted sword. Use the Proficiency, Endurance, and/or Potential Augments to stretch out the number of times the skill can be executed before being exhausted. Obviously, stamina curatives like Giant Fish, Staminal Drench, Mushroom Potage and Ambrosial Meat can help.
- Warriors: Indomitable Lash can make short work of a downed Drake, more so if the Warrior is wielding Malignance, a rather powerful Ice Based Elemental Weapon, it can also render a Drake's wings useless in only a few slashes.
- Sorcerers: High Maelstrom works well against the Drake as it has a wide attacking radius and can easily hit the heart without having to aim accurately, the multiple hit from this spell can sap away the Dragon's health quite quickly and keeps it staggered often. A whole team of Sorcerers, spamming High Maelstrom can fell a Drake in no time.
- Mystic Knights: Abyssal Anguish and Great Cannon are both separately extremely effective against the Drake, provided you have an ice enchanted weapon like Almace equipped (or enchanted via spell). With Great Cannon, have the pawns distract the Drake long enough for you to cast at least two sigils and fire away, the amount of shots are enough to generate a fair amount of continuous damage and also hit almost every part of the Drake's body. This also causes most if not all of the body parts to break. It is also possible to use the Cannon to deliver the killing blow on the heart, so there's no need to move in close for the final hit, which must be exected by the Arisen. Other augments such as Acuity and Attunement, Clout and Vehemence will achieve a better result. The Wyrmking's Ring also helps as it shortens charging times. If done right, the fight can be finished without taking even a single point of damage. Also, the MK's Ruinous Sigil (ice enchanted of course) does MASSIVE damage to the heart when it's knocked down. Just stand by the heart(don't even have to be THAT close) & spam away until he gets back up.
- Magick Archers: Clear out the hill opposite the grove where the Hobgoblins and Cyclops are. Once that hill is clear go into the grove just far enough to shoot the Drake and get its attention. Quickly run back to the cleared hill and stand in front of a chest by a tree. Stay there and use long range skills to shoot the Drake every time it cycles back towards the player's party. It will go in a loop towards the player, get to main path, turn around, go to the woods, turn around and come back to towards the player again. It may take you a long time but it is possible to defeat the Drake this way. Save the game every time it goes back to the groves.

WARNING: When knocking it out of the sky by the main pathway, be careful how often attacks hit the Drake, especially as it gets up. It may decide to break the loop and come over onto the hill. A quick dash away from it without engaging will send it back to its grove but it is best not to risk it if the player's party are under-leveled for this fight.
- When the Drake takes to the air, attacks to its heart, head or wings will bring it down when enough damage is dealt, or if it is staggered by a single strong attack. Oftentimes, this can be used to put the Drake in a cycle, as when it recovers from the fall, it will likely try to fly up again. Repeated attacks to the wings will eventually disable the Drake's ability to fly.
- Because of the area layout and computer AI an effective way to kill the Drake in Devilfire Grove is to climb onto one of the nearby rock formations. As long as the low side isn't nearest to it, it will attempt to charge to no avail, leaving the player vulnerable only to its roar, fire and flight attacks. While the first one is unavoidable, the second usually is also ineffective, more so depending on the height of the rock ledge. Its AI will most likely cause it to jump into the air in this situation, making it a sitting duck for most ranged classes. Simply let it fly towards the player, shoot its heart/head/wings (whichever preferred, although enough shots to the wings will stop it from flying, which might be preferred) to cause it to fall back to the ground. Attack making sure to save enough stamina for when it jumps into the air again, repeat until it is dead. If attempting to revive pawns it is best to wait for it to be shot out of the air and stunned momentarily before rushing off the perch to attempt rescue.
Tactics (Defensive)
- The Stability augment is very useful against all Draconic enemies (including the Ur-Dragon). All wind attacks are nullified against the Arisen, meaning that one cannot be blown over backwards or interrupted while casting spells or charging skills. Wing buffets can also be blocked or Perfect Blocked by a shield or magick shield.
- The application of one Sobering Wine will clear all status effects from the party and provide an additional 90 seconds of party immunity. This includes Fire, Possession and Skill Stifling, the three most common debilitations inflicted by the Red Drake.
- Beware that after a Dragon Horn drops from the Drake's head, it will always rear up and Dragon Roar to instantly kill your pawns. Pawns will declare ''The horn is destroyed!''. The only way to disrupt the Dragon roar is to quickly inflict enough damage to its heart to stagger it out of the roar animation.
- Destroying a wing will also always make it roar. Pawns will declare "It's grounded, Master.".
- After the Drake grabs the player and slams him/her to the ground, it will follow up with a charge attack.
- The Drake's charge attack can be blocked or countered with Masterful Kill or Clairvoyance for massive payback. A Perfect Block of the charge attack will do the same.
- If the player and his/her Pawns dashes behind the Drake as it rears up to roar, it will have no effect. If far enough away from the drake at the time of the roar (a considerable distance if in front of it) the roar will also be ineffective.
- The Drake usually uses a grab attack after using Roar. If there are any Pawns near the Drake, do not revive them first or they will be grabbed. Move out of the way and revive Pawns that are further away first.
- Bring some Empty Flasks so a player can bottle the Spring Water in the Healing Spring southwest of the Drake's spawning area in Devilfire Grove. Being able to heal the player and pawns simultaneously helps, especially after the Roar attack.
- Standing behind a tree can render the Drake's attacks --- most notably the Fire Breath and the Roar --- harmless; this doesn't work if the head is 'inside' or clipping through the tree.
- The Drake can knock out the Arisen's lantern at night and make finding the Drake rather hard since it can only be seen by the glow from its mouth and chest.
Tactics (Pawn-specific)
- For offensive pawn tactics, consider using a Strider pawn with a Scather inclination and high or full bestiary knowledge of this enemy as they are likely to climb the Dragon and do all the work for the Arisen by shredding the Drake's heart (check to see if the pawn has the Adhesion and/or Opportunism augments as these are very helpful for climbers). Gloves of Might will also improve a pawn's climbing speed and grip.
- A powerful Ranger pawn will shoot the Drake directly in the heart from a distance, which is very effective. Check for the Challenger inclination and high bestiary knowledge of this enemy when hiring.
- Defensively, consider using a Mage pawn with the Legion's Might staff, since that special staff auto-resurrects pawns from the Dragon roar and conventional deaths. Although the staff has a lower attack strength than other more powerful staves, its special function allows the Arisen to focus on attack and not worry about running around reviving pawns.
- A pawn equipped with a Rusted weapon can inflict Torpor (slow) on the Drake. This makes the fight MUCH easier, as the Drake moves in slow motion and its attacks are easy to avoid, and its heart easy to shoot/attack. Torpor can be inflicted by hitting ANY part of the Drake (not just the heart), and pawns often attack the other body parts anyways. Note that the higher the enhancement of the Rusted weapon, the higher the chance it will inflict Torpor (slow).
- CAUTION: A higher level support pawn CAN annihilate the entire party if they become possessed. Proper potions/curatives that remedy Possession should be carried and utilized as necessary. One can avoid this problem entirely with Possession resistance equipment such as the Hellfire Cloak.
- When the Drake grabs a Pawn and begins possessing them, the move can be interrupted by directly attacking the claw holding the Pawn. Dealing enough damage to the Drake until it staggers will release the captured Pawn.
- Pawns having 100% resistance to Possession (for example, wearing the Hellfire Cloak) can no longer be affected by any attack inflicting this debilitation. They simply free themselves at the end of the grab animation giving a lot of extra time to the Arisen.
- The longer a Drake takes damage without inflicting any, the higher the chance that it will Dragon roar and kill all pawns within range (the area behind the Drake is safe for pawns).
Notes
- Devilfire Grove is the best place in the game to level up and Dragonforge weapons & armor past the three star enhancement level. Step 1 - Get the Blessed Flower from Quina and clone it at the Black Cat, immediately storage it thereafter (*NOTE* You may want more than one copy of the flower). Buy 10+ Ferrystones from the cat too. Step 2: Go to Devilfire Grove and place a portcrystal at the camp. Warp, get the flower, warp back, and kill the drake. (*NOTE* An easy way to kill the Drake, when going to the grove from the camp, trigger the Drake and then return to the "U" shaped rock passed when first entering the grove. Press yourself close in to the bend of the rock. You will be shielded from 90% of the Drakes attacks. Simply cast Magic or shoot him with your bow at that point.) Step 3: After killing the drake and collecting your goodies, warp to Cassardis Inn and immediately store the Flower and use the inn there for 7 consecutive days, staying till morning. (*NOTE* Make sure to search under the cabinet after the goodies in the inn spawn to grab gold sacks, some as high as 10,000 g's!) Step 4: Grab the Flower from storage and go kill the drake again. Repeat this process for easy level up and money gain from the dragon parts, plus the flower resets each time you do it. Occasionally you will want to return to the Black Cat and stock up on Ferrystones and more flowers, just in case you need them.
- The Drake takes more damage when it is writhing on the ground with its heart exposed than it does when it is on its feet.
- When the Drake flies into the air and goes off to a new spot a little distance away, if the player does not immediately follow it, it's often far away enough that one can save the game and then go to re-engage it in battle. However, this can lead to problems as well, occasionally it won't re-appear when flying off causing the player to gain dragon forged items at the normal rate fairly low rate. This has happened when the message that an item has become dragon forged pops up, or after flying away the dragon just disappeared (it is generally accepted that the drake flies off into the sea and drowns itself, which is what causes this to happen).
- The Drake is the 'land based' dragon, most likely to stay on the ground as opposed to take to the air; the Wyrm is a spell caster; and the Wyvern being the flyer. While they all share characteristics, as a rule of thumb one can count on these preferences from each of the different dragons.
- When carried in the party's inventory, the Drake's Tear, Wyrm's Tear and Wyvern's Tear altogether will increase the drop rate percentage of rare loot and Wakestones in The Everfall dungeon.
- It would be best not to engage the drake in Devilfire Grove unless the Player's level is high enough.
- Up to 8 total drops can be rewarded by killing a Drake, including 2 Dragon Horns (from striking the head) and 1 Great Dragon Alula (when the wings are disabled).
Trivia
- The Drake is lesser kin of The Dragon, and it is the Fire-based counterpart to the Wyrm and the Wyvern.
- The Drake is also the only one of the dragon's lesser kin to be available before killing The Dragon.
- As of Dark Arisen, it seems that Drakes found roaming the overworld have a chance to flee from the Arisen if the situation grows dire; much like monsters found in another Capcom series, Monster Hunter.
- After defeating The Dragon, a special version of the Drake can be found in the Conqueror's Sanctuary. It has more HP than the common drake, and unlike most Dragonkin, this particular one speaks in English rather than Latin.
- When the Drake uses its Roar attack, it may shout: "Arisen!" This indicates the Drake has the upper hand in the fight. Act accordingly.
- During the game start-up a Drake can be seen drinking water from the river that serves as a natural border between the Wilted Forest and the Cursewood. However in the actual game, no Drake is found in this area.
Quotes
- Latin Quotes:
- "Arisen!!" (Battle Start)
- "I am your master." (when possessing a Pawn)
- "Slay your master!" (when possessing a Pawn)
- "Aye, that is the way, chosen one!" (indicates approval of tactics)
- "Show me your power!"
- "Such power!"**
- "The seat of god lies beyond..." (death throes)
- "Am I to die...?" (death throes)
- "You are not the vessel..." (upon killing the Arisen)
- English Quotes:
- "Arh..Ah! ... Who are you?"
- "I must feed...slake my hunger!"
- "Your heart, give it here!"
- "What have I? Ngh? Wauuugh!"
- "Aye, that is the way, chosen one!"
- "Show me your power!"
- Generic versions of the Wyvern share dialogue with the standard Drake and Wyrm.
Gallery
")
")
")
")
")
")
")
")
")